Paper Crafting and Painting

Paper Crafting and Painting
A few of my favorite things...

Tuesday, November 1, 2011

Consider a Cricut Cozie

Cricut getting dusty?  Mine sure has been, but not anymore.  Consider a Cricut Cozie.  You can order a customized one to match your crafting space just like the one seen below: found at Custom Cricut Cozies Just choose the fabric you want or ask for something in a specific color or theme. 
I have this one and I love it!  It matches the blues and browns I have in my studio already.  Custom Cricut Cozies makes them for the Cricut Expression/Cricut Expression 2 and the Cricut Create. I love knowing that dust won't be interfering with my cuts or the mechanics of my Cricut. 

Tell me what you think: 
Do you have one or have you considered buying one?

Monday, September 12, 2011

Embossed Buttons

Last week was really busy, getting five kids back to school--I really haven't had time to do any extra projects, other than a little sewing for back-to-school.  So how about a fun tip. 

I recently wrote about seed beads being a great way to add dimension to your projects. another fun way is using embossed buttons.

Not only does this picture show the embossed buttons, it also shows a cute way to use them.  They are so much fun and add dimension to your scrapbook pages, cards, gifts, treat bags and more. Have fun!

Saturday, August 27, 2011

Bewitching! With Cricut's Happy Hauntings!

For fun today I thought I would try out Inkssentials Clear Glossy and Black Enamel accents. 

 I used the clear on the green bird and black on the rest of the frame.  I was hesitant to use it when I read the instructions which read "let cure overnight for best results".  Being impatient I decided to try it anyways and after applying it I used a warm blow dryer and it was completely dry in just a few minutes. I am sure you could also use your embossing gun, I seem to have misplaced mine.
Bewitching card with Inkssentials accents.
For fun write inside with a silver or white gel pen.
          
I chose patterned paper from echo park's the Apothecary Emporium paper pack.
I used the frame(black card stock frame, green card stock bird) and witch (purple card stock) on pg. 44 cut at 4 1/4". I also used the Phrase "Bewitched" in green card stock and it's shadow, in black card stock, on pg. 60 cut at 3/4".


Ink around purple witch and purple strip with silver ink.
Paper dimensions:
Black Card Base: 11" X11" (folded 5 1/2" X 5 1/2")
1st layer: orange splattered print: 5 1/4" X 5 1/4"
2nd layer: black print: 5" X 5"
3rd layer: purple strip 1 1/4" X 5 1/2"
Other supplies: 2 green coordinating brads, 2 silver, *black and silver ribbon.
*Note before adding layers to card base adhere ribbon on back--I used scotch tape.


Friday, August 26, 2011

Need More Dimension? Try Seed Beads!

Often I look at a card I have made and think, this card just needs something more. It is usually missing dimension.  Pop dots are a great solution for this and so are seed beads.  Not only do seed beads add dimension, they also add texture.  So the next time you need a little more dimension, try seed beads.  Click on the pictures for a larger image.


 Orange Seed Beads can be found at your local craft store on the bead aisle. I purchase mine at JoAnn's.
I used some craft glue to draw lines on my pumpkins and then placed it on a paper plate and dumped seed beads all over the glue and then tapped the card to shake off excess beads. When I was finished I dumped the beads from the plate onto a folded piece of paper and used that to funnel the beads back into their container. 
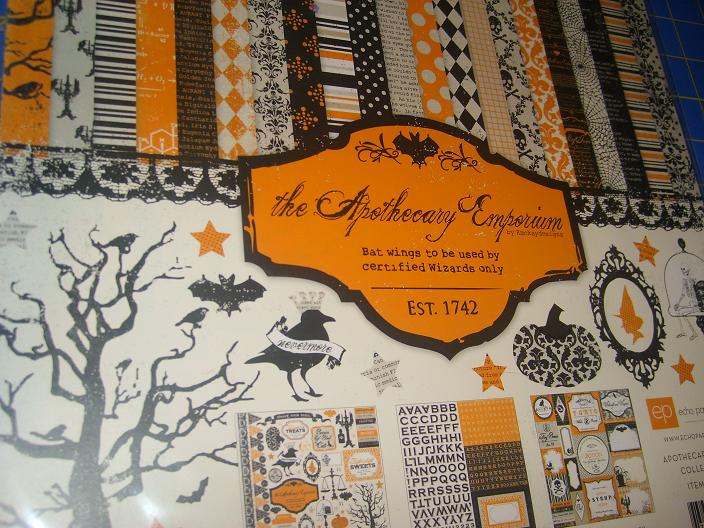
 I love Echo Park Paper. I chose some polka dots from their brand new the Apothecary Emporium Pack.
Paper Dimensions: Card base 8 1/2"X 5 1/2" 
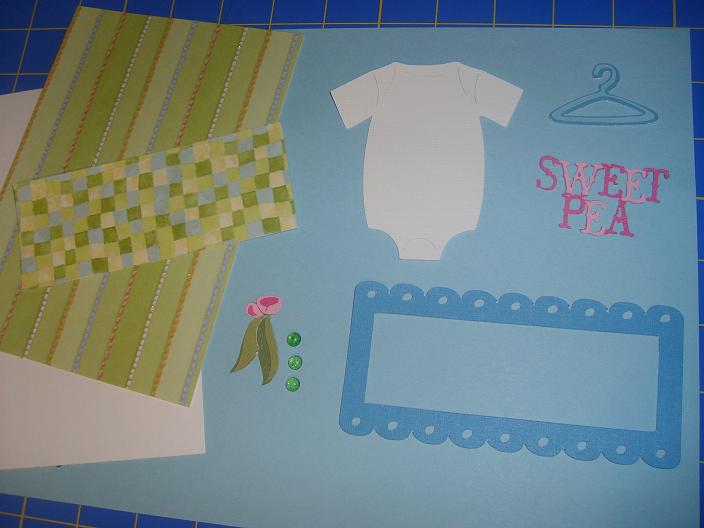
1st layer (Green card stock) 5 1/4"X 4"
2nd Layer (Echo Park polka dots) 5"X 3 3/4"
3rd Layer (Green card stock strip) 4 1/4"X 1 1/4"
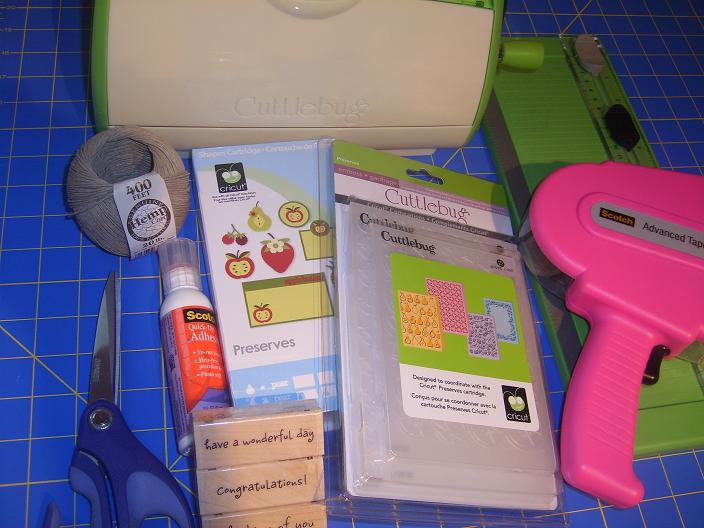
Punch (or use your cricut) a 3/4" square out of white card stock -stamp sentiment
Punch (or use your cricut-ie. George and Basic Shapes) a 1"square out of Green Card stock.
Attach together with an orange (or coordinating colored) brad.
I used some stampin up stamps and choose some ink to coordinate with my card stock and patterned paper.
Use Chestnut Roan Colorbox chalk to ink around the edges of the all paper. 
Note for ribbon: After layering 1st, 2nd, and 3rd layer add coordinating ribbon before adhering layers to card base.
Pop dot up stamped images.
 This looks cute--but it just needed something more for added fun!
I know! How About Seed Beads!  =D
I love that I am getting so many page views.  Thank You! Please consider leaving a comment or following my blog. 

Wednesday, August 10, 2011

Spice Up Your Craft Room

I have realized, recently, that I spend a lot of time sewing, painting, crafting, etc. for others, which  I love to do, however I rarely do anything for me.  So this summer I have made a few projects for my studio. I hope everyone is having a fun and safe summer! Please take a moment to comment and to tell me what you have been up to this summer. =)

The Sewing machine cover is made from McCall's M6095--I did make mine a little different.  I made it to be reversible and also used bias tape on the bottom. The Craft organizer and design board are my original designs.  Click on pictures for a larger view.
 Sewing Machine Cover, with matching pin cushion
 Craft Organizer-This will fit file folders in the top three pockets, steno note pads in the brown divided pocket, and small note pads etc in the three small pockets.  I used a painting canvas as my base knowing it was already ready to hang on the wall.
Design board.

Friday, August 5, 2011

Last Chance to win a free Cricut!

Hey everyone, July has been a crazy month for our family with my kids activities and vacation plans--Keep an eye out--I will be posting more project ideas this month. 

Today is your final chance to enter to win a free Cricut from My Craft Channel.  There are three simple ways to do this, just check out their My Craft Channel blog website to see how. And they are also looking for a fresh face to become one of the My Craft Channel hosts.

Thursday, July 21, 2011

Sweet Pea!

Baby Card--Sweet Pea!
Today I am having some fun with lines and layering--using Cricut cartridges:Cricut Sampler, Wild Card, and Country Life.

Click on pictures for a larger view.
From the Cricut Sampler cartridge cut one 3 1/2" White Onsie from card stock (pg. 33), hanger and one 2" light blue shadow tag (pg.41). (Not shown) see below.

From the Country Life cartridge cut one 1 1/4" peas with layers using a light and dark green card stock(pg. 48) I made the flower a little bigger with light and dark pink card stock. Next cut the phrase out at 1 1/4" from dark pink card stock(also from pg. 48). And then cut the W-E-A out of light pink card stock.

From the Wild Card cartridge cut one 10"medium blue frame (pg. 76) from card stock. It needs to measure  2 3/8" X 5".

 Unfolded white card stock card base is 10"X 14" (folded 5" X 7") Ink with blue color box chalk around folded front edges.

--1st layer green paper with colored stripes (Debbie Mum) see paper pack below.

--2nd layer--first medium blue frame, then checkered paper strip 1 3/4" X 5" (from Debbie mum paper pack), next dark pink card stock strip 1 1/8" X 5", and finally light pink card stock strip 3/4" X 5".

--Before assembling onsie ink around the edges with blue colorbox chalk and also ink where the cut marks are on the onsie for depth. Assemble onsie and glue on three green Robin's Nest dew drops (small glass pebbles).

Next attach horizontal 3/8" coordinating ribbon (green checked ribbon) and then assemble blue shadow tag. Glue on Sweet Pea and tie on ribbon and then pop dot on tag and pop dot on onesie.

Thursday, June 30, 2011

Have a Wonderful Day! Using Cricut's Preserves Cartridge and Cuttlebug Companion

Have a Wonderful Day! Card
Be sure to click on the pictures for a closer look.
Steps below:
Choose coordinating card stock and a piece of chipboard. (see above)
Cut out the apple parts (2") from pages 27, 28, and 29 of Cricut cartridge, Preserves.

Stack apple parts and glue. Cut 3- 3" tags (out of chipboard) and tops (out of dk. brown card stock) from page 36 of Cricut cartridge, Preserves.
White Card stock for card base before folded measures 10" X 7"
First Layer - dark green card stock  6 3/4" X 4 3/4"
Second layer - red card stock 6 1/2" X 4 1/2" (ran through Cuttle bug with Cricut Companion Preserves)
Third layer -  dark green strip 6 3/4" X 1 3/4" Be sure to adhere ribbon with ATG gun before putting layers together.
Put layers together
Tie on hemp cording on tags and secure on backs with tape.
popdot on apples then use your ATG or other adhesive to attach tags onto your card.
Stamp sentiment.
 I used hemp cording ( I found in the jewelry isle) on my tags and my sentiment "have a wonderful day" stamp is from INKADINKADO (A three pack I purchased at JoAnn's).


A Washington state inspired card!  What do you think? What does your state inspire you to make.  
Please share a comment below.

Thursday, June 23, 2011

Fourth of July Party Favor! Keep it Simple!

This matchbox American themed, party favor turned out so cute! Great for your party guests and will be a super fun treat on the kids table.
 For the kids table try making a matching crayon box fromTags, Bags, Boxes & More and add to the table some fun American themed pictures to color.
 I used the Cricut cartridges Tags, Bags, Boxes & More and George and Basic Shapes. I also used the K&Company Americana paper pack.
 At this point I had not decided if I wanted a window or not on my matchbox, although it is cute and would look fun with cellophane on the inside of the window, I opted for no window.  I cut one standard sized (the size that your Cricut automatically cuts) matchbox cover from Tags, Bags, Boxes & More pg. 123 and the box that inserts inside (part that holds the jelly beans) on pg.124. Then I used George and Basic shapes and cut out some 1 1/2" stars from pg. 94 (only need two).

Using the scoring blade on my Cricut trimmer I scored all the marks on both the matchbox and the insert box and then used my bone folder to get crisp folds.  I used my ATG gun to secure the flap on the match box cover (the blue star paper) and then used some Scott's Adhesive glue to glue the flaps inside the red match box insert. 
 Tools and supplies used
I used fabric glue to glue the 1/4" white grosgrain ribbon onto the bone colored bias tape and then secured it onto my box with my ATG gun. I added a pop dot in between the two stars and added a button (using the button punch above) cut out of denim colored paper (sold by the sheet at JoAnn's) made by Paper Dazzle, that I tied with white embroidery floss. I did run the denim colored paper through my Cuddlebug to get some texture on my button, but it is difficult to see in the picture. Fill with red, white, and blue jelly beans and you are all set!  Happy Fourth Everyone!!

Monday, June 13, 2011

"There's A Little Cowboy in all of us..." So Happy Father's Day Buckeroo!

My Pink Stamper issued a color challenge this week using green, turquoise, and orange.  I decided to design a card with a Father's Day theme, since the big day is this Sunday. Feel free to join in on the challenge by clicking on this link My Pink Stamper.

 I have seen pictures of my dad dressed up as a cowboy when he was  a little boy and thought a cowboy themed card would be fun, using the Cricut cartridge A Child's Year! So giddy up! Assembly instructions below.


 Cut from black card stock, one 5" image from Cricut cartridge A Child's Year - pg. 73
Both were so cute I had a tough time choosing.

Folded Card base is 5" X 7", 1st layer black card stock 4 3/4" X 6 3/4", 2nd layer orange scrapbook paper (DCWV Flower Shower Spring Stack) 4 1/2" X 6 1/2", 3rd layer green scrapbook paper (DCWV Flower Shower Spring Stack) 4 1/4" X 6 1/4", fourth layer is three stripes of turquoise and green patterned paper 7" X 3/4", Cut orange paper for sentiments to match size of stamp or sticker. Ink with Color box chalk, chestnut roan, around sentiments and card base. After putting layers together, before adhering to the card base--wrap beaded twine around the card and then put pop dots on back of cowboy.
 Tools used: Cricut paper trimmer, bone folder, ATG gun, scissors, Colorbox chalk - chestnut roan, and pop dots.
DCWV Flower Shower Spring Stack, Cricut Cartridge A Child's Year, Avery's Clear Sticker Project Paper.  Whenever I can't find the perfect stamp to use I quickly make a clear sticker on my computer and just print my sentiment off onto Avery's Clear Project paper, love it!!

Saturday, June 11, 2011

Life is Short. Eat Cupcakes First!

Wouldn't this make a cute birthday card or a reminder, in this fast pace life we live in, to just stop and enjoy the moment. I made this cute card, "Life is Short. Eat Cupcakes First" using Cricut's, Once Upon A Princess Cartridge.  I always try to have lots of cards pre-made to fit any occasion, so I can just reach into my storage box and find the perfect one. 
 Notice I used Avery's Clear Sticker Project Paper, I love having this on hand.  When I can't find the perfect stamp among what I have, I can quickly make a clear sticker to say whatever I want, in this case, "Life Is Short. Eat Cupcakes First!"
 Tools used: Cricut cutter, bone folder, ATG gun, Scotch glue (for pink bow on cupcake), tape, pop dots, and scissors.

Supplies Used: (Tools shown above)
White Card stock - 8 1/2" X 5 1/2" (Fold for Card)
Brown Card stock - 5 1/4" X 4" (1st Layer)
DCWV Pink Stripe paper - 5 1/8" X3 3/4" (2nd layer. Sold by single sheet @ JoAnn's)
DCWV Sweet Stack, cupcake strip - 5 1/4" X 1 1/2" (3rd layer (strip))
Jolee's All that Bling Jewels -  Pink (cupcake toppers)
Colorbox chalk -  Chestnut Roan (inked card base and around cupcake strip)
Ribbon 5/8" brown
Ribbon 3mm pink (bow on middle cupcake)
Pop Dots - place a pop dot under each cupcake
Avery's Clear Sticker Project Paper - (or stamp a sentiment)

Cricut Cartridge  - Once Upon A Princess (Pg. 49) make three 2" cupcakes