Paper Crafting and Painting

Paper Crafting and Painting
A few of my favorite things...

Showing posts with label cards. Show all posts

Tuesday, April 3, 2012

A Little Bird Told Me, That it Was Your Birthday!

Hey Everyone,

I hope you are having a great Tuesday!  It feels like it has been raining all day here in the good old northwest! So I decided to make a Spring inspired birthday card to cheer me up. =)

Used your border punches lately? I pulled out my Arched Lattice border punch by Martha Stewart, thinking "this reminds me of Spring". In need of a few birthday cards this month, I came up with this cute card to add to my stash!~ Happy paper crafting! Picture and Tutorial Below. ~


Saturday, March 24, 2012

Brilliant Blue Dimensional Butterfly

Hello everyone!  It has been about two weeks since my last video so I am excited to share this project with you. =)

I love how cute butterflies look on paper crafting projects. My inspiration for this pretty card comes from a tee-shirt my parents brought back from Peru for one of my daughters.  It is turquoise with a royal blue butterfly on it.  And I thought how cute it would be if it looked like it could almost fly off the card. I also really wanted to try out my newly purchased Cricut Cartridge, Fancy Frames.  To finish the card off I used some ink essentials glossy accents around the frame on the scroll work and also on the body of the butterfly.

Check out the picture and tutorial below. Happy Paper Crafting!
Brilliant Blue Dimensional Butterfly Card
By Cathi Judd
Direct Youtube link for this project:
Brilliant Blue Dimensional Butterfly Card

Saturday, March 3, 2012

Heaven isn't far...with your Cuttlebug, Spellbinders and embossing folder!

Happy Saturday Everyone! I hope you are having a great weekend. If you have a moment please watch my latest video below on using Spellbinders Nestabilities inside your Cuttlebug. There is a spastic moment and a song, you won't want to miss--okay well maybe the song... What a day!

Picture and Tutorial below: Happy Crafting!
Heaven isn't far...when your with the ones your love.
YouTube Link:
Heaven isn't far...with your Cuttlebug!

Thursday, February 9, 2012

Love won't keep...so I am giving mine to you!

Today has been a busy one...but I had a small spark of inspiration in my sleep last night and here is the card I came up with. I hope you have all had a wonderful day! =)

Picture and tutorial below. 
Love won't keep...(inside) so I am giving mine to you!
YouTube link:

Tuesday, February 7, 2012

Smile at the Rain!

This morning I was thinking of a good friend who is going through a tough time right now…and thought sometimes we need a reminder that our troubles make us stronger and that things are going to get better.
 So this “smile at the rain” card is a reminder that if we didn’t have rain the flowers and trees wouldn’t grow …and that eventually the rain stops and the sun comes out. =)
Picture and tutorial below:
Smile at the Rain

Direct YouTube link:

Saturday, February 4, 2012

Get Well Soon! Card

It has been such a nice Saturday. I spent time in my studio, did a little cleaning, shopping, and then went out to dinner with my family. I love a low-key and low-stress day. =)

Here is a fun card I made this morning, using the "Just Because Cards" cricut cartridge and the "Just a note" cartridge. I love how adding the light blue just made the card "pop". Picture and tutorial below:
Get Well Soon!
Direct YouTube link:

Thursday, February 2, 2012

It's Groundhog Day! Have a wonderful day, card.

Hello everyone! Happy Grounds hog Day! Looks like Punxsutawney Phil saw his shadow today and we need to be ready for six more weeks of winter.  =) Oh goody!
In the meantime, here is a cute card with a fun little critter on it to celebrate groundhog’s day. Picture and tutorial below:


Have a wonderful day!
Direct Youtube Link:

Tuesday, January 31, 2012

Happily Ever After! With Seed Beads.

Hello Everyone!  I hope you are having a nice day.  We are off to a good start over here. The oldest kids are out the door and the little ones are just waking up and having breakfast. So we are off to a good start. =)

Last night I was looking through my stash and saw that I hadn't used any seed beads in awhile and decided they would be just the right touch to embellish the wedding dress on  my "Happily Ever After" card. Below is a picture and tutorial.  Have a great day!
Happily Ever After!

Here is a direct link to my Youtube version:

Thursday, January 26, 2012

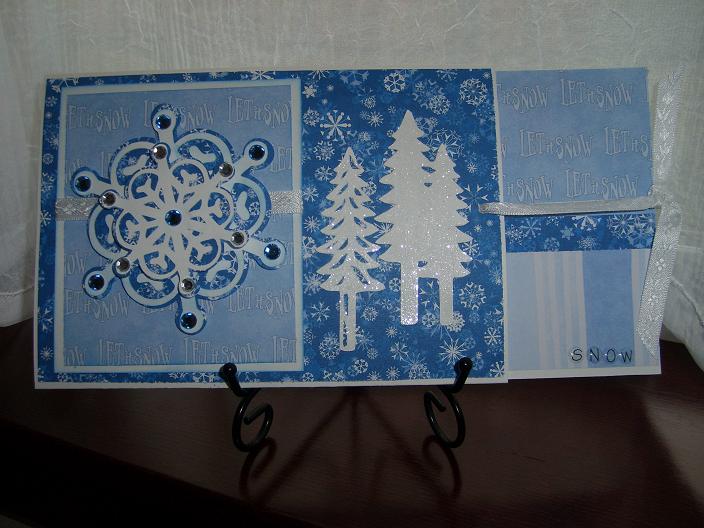
Let it Snow! Slider Card

Card's Magazine has issued a challenge, "Wow Challenge #3 Snow Inspired." So if you are looking to participate send your "snow" themed card to: 'wendysue@northridgepublishing.com' by February 3rd. They will be picking cards to be displayed on their website. =)

Here is my snow inspired card. Picture and tutorial below.
Let it Snow!

Here is a direct link to my Youtube tutorial:

Wednesday, January 25, 2012

Thank You Sew Much!

Good morning everyone!  As an avid sewer, I thought it would be fun to mix my love for sewing and paper crafting into one, to make this cute card. Please enjoy the picture and tutorial below.  The tutorial is actually quite entertaining as you can hear my children squabbling in the background...I can't wait to tell them they are famous!  Hopefully they will be embarrassed enough to show more love for each other...we'll see.  =)

Thank You Sew Much!

Here is a direct link to this tutorial on Youtube:

Tuesday, January 24, 2012

Butterfly Kisses Birthday Card!

Happy Tuesday! I hope everyone has gotten over the "Monday blues". Speaking of blue...I love putting blue and brown together.  It is so soothing to me! I was looking through my cricut cartridges looking for some inspiration and saw that I hadn't used my Sentimentals cartridge in awhile.  Sentimentals has such beautiful images that helped to inspire this butterfly birthday card design. See the photo and tutorial below. =)

Butterfly kisses and birthday wishes.

Here is a direct link to this video on my youtube channel:

Saturday, January 21, 2012

Loving Us - Card

I am so relieved to see the roads clearing of snow.  The snow is so beautiful but after a week of been couped up, it is nice to get back to a regular routine.  Although being snowed in did give me some time to get caught up on some orders for my business and make some fun projects to show you.  Here is one of the cards I worked on.  I love the designing process.  Playing with color, texture, lines etc. and watching my ideas come to life is very exciting.  This card I thought would be fun for Valentine's Day, an anniversary, or a just because card.  Picture and tutorial below.  Have a great Saturday!
Loving Us, By Cathi Judd
Direct Youtube Link: Loving Us - Card

Tuesday, January 17, 2012

My Special Valentine - Loved You Since Our First Touch

I cannot believe this crazy weather we are having.  It looks like about six inches of snow and it is still falling. Here is a picture I took a few moments ago.  The kids of course are thrilled. Snow day!  And check out the card I made for my special valentine.  There is a picture and tutorial below.  I hope all those snow bound or snowed in are staying warm.  =)


If you click on the picture you can see the snow falling.  =)

Loved you since our first touch

If you have any trouble viewing this or reading the text here is a link to my Youtube channel: My Special Valentine

Friday, January 13, 2012

Special Delivery - A card to welcome a new baby!

I thought it would be fun to make some cards for some of my friends who are expecting new babies this year.  I love pink and green together, it looks especially sweet on this card, which would also make a cute birth announcement. Now I will have to try it in blue and green.  =)

Below is a picture and a tutorial. 
Special Delivery!
If you have any trouble viewing the text or seeing the video,
here is a direct link to my Youtube channel: 

Please leave a comment.  What kind of projects are you working on right now?

Monday, January 9, 2012

Poodle Skirt - Happy Birthday Card

Hey Everyone.  I hope you have had a great weekend.  Ours was a quiet one and after the busy holidays I was thankful for that. My birthday card stash is getting low so here is a fun one. This card is inspired by my daughter Erin.  She loves the 50's and pink! So I thought what better way to ring in her 10th birthday then with this cute Poodle Skirt Birthday Card!   Picture and Tutorial Below:

If you have any trouble viewing the text or seeing this video here is a direct link to my youtube channel: Poodle Skirt Birthday Card Consider subscribing to my youtube channel to receive my video's as soon as I post them. =)

Leave a comment and tell me what your New Year's Resolution is for this year.  Mine is to use my time more wisely.  I can get so focused on one thing that I let other things around me slide and before I know it the day is through.  =)

Wednesday, January 4, 2012

Elegant Valentine - with tutorial

I love giving and receiving handmade Valentine cards!  There is just something special about knowing that not only are they sent with love but a little of time also went into them.  Below is a picture, and  tutorial. The measurements and scoring lines for this elegant tri-fold Valentine are in the video. I don't know who orginally came up with the idea of a tri-fold but they sure are cute, and add an upgrade to the simple half fold.
Below is my first video and I am pretty happy with it-for a first try.  Please pardon a few seconds at the beginning of blurriness and at don't forget to slip in one last piece of ribbon and tie a knot as you will notice I forgot to at the end. Thanks for watching and please leave a comment.  =)
It looks like some of the text is not showing because of the small screen. So to see all of the text, or if you are having touble viewing the video; here is a direct link to my youtube channel: Elegant Valentine Card Thank you for watching.

Saturday, August 27, 2011

Bewitching! With Cricut's Happy Hauntings!

For fun today I thought I would try out Inkssentials Clear Glossy and Black Enamel accents. 

 I used the clear on the green bird and black on the rest of the frame.  I was hesitant to use it when I read the instructions which read "let cure overnight for best results".  Being impatient I decided to try it anyways and after applying it I used a warm blow dryer and it was completely dry in just a few minutes. I am sure you could also use your embossing gun, I seem to have misplaced mine.
Bewitching card with Inkssentials accents.
For fun write inside with a silver or white gel pen.
          
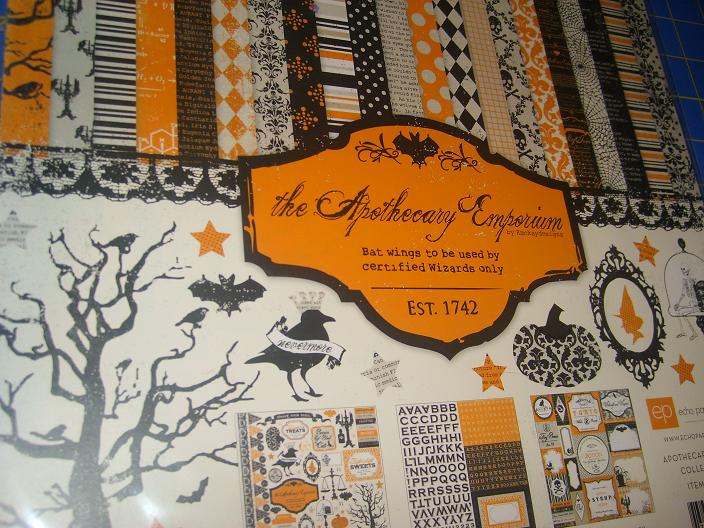
I chose patterned paper from echo park's the Apothecary Emporium paper pack.
I used the frame(black card stock frame, green card stock bird) and witch (purple card stock) on pg. 44 cut at 4 1/4". I also used the Phrase "Bewitched" in green card stock and it's shadow, in black card stock, on pg. 60 cut at 3/4".


Ink around purple witch and purple strip with silver ink.
Paper dimensions:
Black Card Base: 11" X11" (folded 5 1/2" X 5 1/2")
1st layer: orange splattered print: 5 1/4" X 5 1/4"
2nd layer: black print: 5" X 5"
3rd layer: purple strip 1 1/4" X 5 1/2"
Other supplies: 2 green coordinating brads, 2 silver, *black and silver ribbon.
*Note before adding layers to card base adhere ribbon on back--I used scotch tape.


Friday, August 26, 2011

Need More Dimension? Try Seed Beads!

Often I look at a card I have made and think, this card just needs something more. It is usually missing dimension.  Pop dots are a great solution for this and so are seed beads.  Not only do seed beads add dimension, they also add texture.  So the next time you need a little more dimension, try seed beads.  Click on the pictures for a larger image.


 Orange Seed Beads can be found at your local craft store on the bead aisle. I purchase mine at JoAnn's.
I used some craft glue to draw lines on my pumpkins and then placed it on a paper plate and dumped seed beads all over the glue and then tapped the card to shake off excess beads. When I was finished I dumped the beads from the plate onto a folded piece of paper and used that to funnel the beads back into their container. 
 I love Echo Park Paper. I chose some polka dots from their brand new the Apothecary Emporium Pack.
Paper Dimensions: Card base 8 1/2"X 5 1/2" 
1st layer (Green card stock) 5 1/4"X 4"
2nd Layer (Echo Park polka dots) 5"X 3 3/4"
3rd Layer (Green card stock strip) 4 1/4"X 1 1/4"
Punch (or use your cricut) a 3/4" square out of white card stock -stamp sentiment
Punch (or use your cricut-ie. George and Basic Shapes) a 1"square out of Green Card stock.
Attach together with an orange (or coordinating colored) brad.
I used some stampin up stamps and choose some ink to coordinate with my card stock and patterned paper.
Use Chestnut Roan Colorbox chalk to ink around the edges of the all paper. 
Note for ribbon: After layering 1st, 2nd, and 3rd layer add coordinating ribbon before adhering layers to card base.
Pop dot up stamped images.
 This looks cute--but it just needed something more for added fun!
I know! How About Seed Beads!  =D
I love that I am getting so many page views.  Thank You! Please consider leaving a comment or following my blog. 

Thursday, July 21, 2011

Sweet Pea!

Baby Card--Sweet Pea!
Today I am having some fun with lines and layering--using Cricut cartridges:Cricut Sampler, Wild Card, and Country Life.

Click on pictures for a larger view.
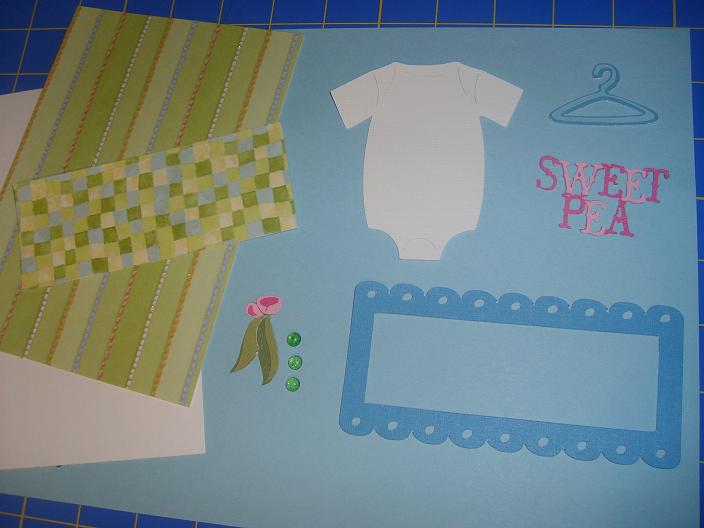
From the Cricut Sampler cartridge cut one 3 1/2" White Onsie from card stock (pg. 33), hanger and one 2" light blue shadow tag (pg.41). (Not shown) see below.
From the Country Life cartridge cut one 1 1/4" peas with layers using a light and dark green card stock(pg. 48) I made the flower a little bigger with light and dark pink card stock. Next cut the phrase out at 1 1/4" from dark pink card stock(also from pg. 48). And then cut the W-E-A out of light pink card stock.

From the Wild Card cartridge cut one 10"medium blue frame (pg. 76) from card stock. It needs to measure  2 3/8" X 5".

 Unfolded white card stock card base is 10"X 14" (folded 5" X 7") Ink with blue color box chalk around folded front edges.

--1st layer green paper with colored stripes (Debbie Mum) see paper pack below.

--2nd layer--first medium blue frame, then checkered paper strip 1 3/4" X 5" (from Debbie mum paper pack), next dark pink card stock strip 1 1/8" X 5", and finally light pink card stock strip 3/4" X 5".

--Before assembling onsie ink around the edges with blue colorbox chalk and also ink where the cut marks are on the onsie for depth. Assemble onsie and glue on three green Robin's Nest dew drops (small glass pebbles).

Next attach horizontal 3/8" coordinating ribbon (green checked ribbon) and then assemble blue shadow tag. Glue on Sweet Pea and tie on ribbon and then pop dot on tag and pop dot on onesie.

Thursday, June 30, 2011

Have a Wonderful Day! Using Cricut's Preserves Cartridge and Cuttlebug Companion

Have a Wonderful Day! Card
Be sure to click on the pictures for a closer look.
Steps below:
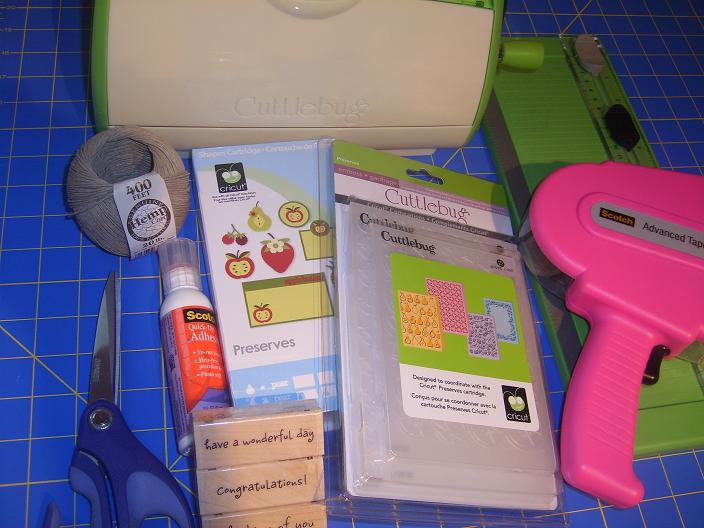
Choose coordinating card stock and a piece of chipboard. (see above)
Cut out the apple parts (2") from pages 27, 28, and 29 of Cricut cartridge, Preserves.

Stack apple parts and glue. Cut 3- 3" tags (out of chipboard) and tops (out of dk. brown card stock) from page 36 of Cricut cartridge, Preserves.
White Card stock for card base before folded measures 10" X 7"
First Layer - dark green card stock  6 3/4" X 4 3/4"
Second layer - red card stock 6 1/2" X 4 1/2" (ran through Cuttle bug with Cricut Companion Preserves)
Third layer -  dark green strip 6 3/4" X 1 3/4" Be sure to adhere ribbon with ATG gun before putting layers together.
Put layers together
Tie on hemp cording on tags and secure on backs with tape.
popdot on apples then use your ATG or other adhesive to attach tags onto your card.
Stamp sentiment.
 I used hemp cording ( I found in the jewelry isle) on my tags and my sentiment "have a wonderful day" stamp is from INKADINKADO (A three pack I purchased at JoAnn's).


A Washington state inspired card!  What do you think? What does your state inspire you to make.  
Please share a comment below.